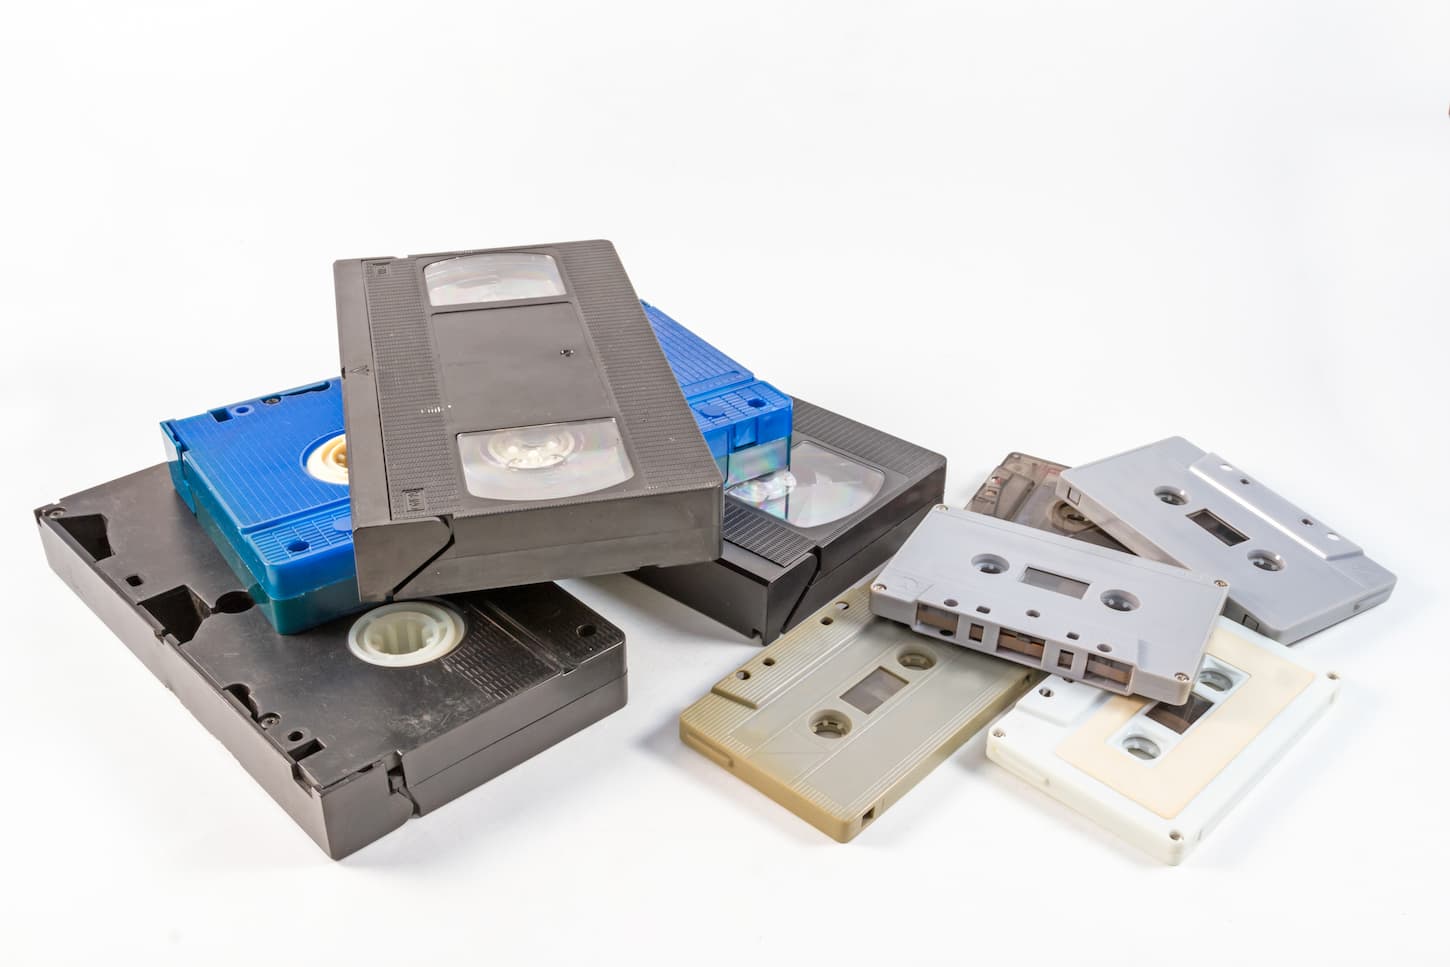
When we’re talking about family videos and how to preserve them, it’s always a great idea to keep those fun family moments. But then we remember about all of the different ways we’ve taken family videos over the years. We’re talking about film reels, slides, VHS tapes (of all sizes), and more. So, how do we preserve family videos?
Create digital versions of family videos and store those digitized versions on several systems (including cloud-based storage). Store the original film (and a way to view it) in archival-quality containers. Create additional digital and physical copies for storage and easier viewing.
Ready to save those family videos for future viewing? Keep reading – and we’ll tell you the different ways and steps to doing just that.
5 Ways to Preserve Family Videos
There are different ways to preserve family videos. Here are the main five, usual ways to preserve family videos. If you want to invent another way (perhaps a better way), then by all means please do so. Just be sure to let us know what it is so we can add it to the list!
Here are 5 ways to preserve family videos.
- Store the original film in an archival-quality container.
- Make sure that you have a way to play the original film – and keep that in archival-quality storage, too.
- Convert the family videos to a digital format for storage.
- Create backups of those files on other servers at separate locations for backup and redundant copies – just in case.
- Keep a local, digital copy for easier viewing of those family films and videos.
Another way to preserve family videos is to make a physical copy of the original family film. However, this step isn’t always easy, technologically feasible, or financially viable, so we’re only listing it right here instead of in the list.
If making a physical copy isn’t going to work, then digitize it for sure. Digital files can get huge – but it’s a whole lot easier to save a few terabytes of video than to wonder how you can make a copy of one of those small, oddly-sized VHS tapes.
How to Preserve Family Videos in 5 Simple Steps
Ready to preserve those family videos? We’ve broken things down into five simple steps – and these steps do cover all of the five ways to preserve the film we mentioned earlier.
That way, you can have your film-based cake and eat it, too. But only on the video, because this metaphor broke down way faster than I thought it would.
1. Create a digital version of the family video.
How you do this is going to largely depend on the physical video format. It’s also going to depend on if you want to do this yourself – or if you’d rather pay someone else to do this for you.
Don’t worry – we’ll talk about all of this in detail later on in the article because it’s kind of a huge (and hugely important) topic.
2. Store the digital version locally for viewing.
What fun is a family video that you can’t watch on demand? Okay, fine – it’s still a great one. But it’s even better when you can watch it any time you want it.
Storing a digital version of a family film for on-demand viewing can mean a lot of things.
- It can mean storing the video locally, like on a family hard drive or computer.
- You could store the films on a sharable cloud-based service (like Google Drive, DropBox, OneDrive, or Apple’s cloud) that syncs with your local files.
- You could store the digital files on your mobile device, although you’d run out of storage space pretty quickly.
We store our family’s pictures, films, and other data both locally on a hard drive and synced to a cloud-based service. That way, we’re getting a jump start on the next step.
3. Create an off-site backup of the digital files.
Accidents happen. That’s why it’s important to have an off-site backup of digital files. This can happen in one of several ways.
- You can create a mirrored hard drive backup at another location (like a friend or family member’s house). However, then you’re 100% in charge of upkeep and maintenance. And upgrading the hard drive when it goes bad or gets full.
- Use a cloud-based storage service to serve as your off-site backup. You could use Google Drive, DropBox, OneDrive, AWS, Apple, or a host of other services.
- You could upload videos less than 50 MB to your My Heritage account. Currently, My Heritage is the only web-based family history site with video upload capabilities.
- Use a video hosting platform as your off-site backup. You could use YouTube (you could keep videos unlisted so that they aren’t viewable by the general public if privacy is a big concern), Wistia, Vimeo, or others.
There are so many options for creating an off-site backup. It can be physical or cloud-based. Feel free to mix and match whatever solutions work for you and your family. Just create the backup, though. It’s heartbreaking when a file becomes corrupted, destroyed, or lost.
4. Store the original film properly.
Then, keep the container in a proper, safe, and adequate container and location. As far as a container? Don’t stress too much. If you’ve still got the cardboard (or plastic) case that the VHS came in, that’s totally fine for storage. If you don’t have a container for it, you can buy a new cardboard (or plastic) case online.
Next, let’s look at the location for where to store your films and VHS tapes. This is where you need to know and follow the same principles for general preservation.
This doesn’t mean you need a white-glove vault. It just means you need to keep your family heirloom items in a place that is:
- Temperature-controlled so that it’s cool and without crazy temperature fluctuations.
- Humidity is controlled so that it is relatively dry (and definitely not dripping wet).
- A safe area in the house that’s less likely to be beset by accidents or incidents. In other words, don’t keep heirlooms under the bathroom sink. An unused bedroom closet would be better!
- Stored away from known problems and issues. Magnets can destroy film (especially VHS), so keep them stored away from magnets and loudspeakers. As long as you don’t keep magnets in the closet, it’s a great spot to store the original films.
- Stored in a proper position. Upright and rewound are the ideal positions for storing a VHS tape. Storing VHS laying down can cause the film tape to sag, which can damage the tape. Keeping them in the appropriate, archive-quality cases
A closet is a fantastic, safe, and easy storage location option for storing your old VHS tapes and film. So don’t feel like you need a vault of some kind.
If you’d like to see the specific archival-quality products we use and recommend, make sure you see our recommended tools page – or go directly to the recommended archival products.
5. Keep a way to view the original film.
If you can’t watch the original film, why keep the original film? If you want to keep the original film, make sure you also keep some way to view the original. Otherwise, the original film is only slightly better than worthless – it’s old memories that aren’t viewable.
Depending on what format the old film is in, go ahead and shop around for a way to view the old film. These places are great sources for where to start looking.
- eBay
- Thrift stores
- Yard sales
- Online sales forums (Facebook Marketplace, Craigslist, local classifieds)
Seriously – make sure you’ve got a way to view the old films if you’re wanting to be able to see them.
Currently, we’ve got an old VHS tape with no tape player. Based on the tape’s contents of a grade school musical, my husband isn’t in a rush to fix the fact that we can’t watch it. However, if it was a particular dance recital of mine (that was epically bad), I’m sure we’d have a tape player before the day was done. Just in case you’re wondering, the dance recital really was that bad. And I don’t have that tape, so no – you can’t see it.
How to Convert Old Tapes and Movies to a Digital Format
There are many ways to convert old tapes, reels, and movies to a digital format. It’s really going to depend on which format the original is – and if you’re converting it to DVD or Blu-Ray or whatever. We recommend that you convert the old film to whatever the most current format is for the record. Formats change, but an MP4 or blu-ray are popular current formats, so start there.
However, before we start converting film to digital versions, we need to make one important decision first: are you going to do this yourself or are you going to pay someone else to do it for you?
Converting the film does require some specialized equipment. The exact equipment varies depending on the film formats. However, you’re going to at least need some specific cables, perhaps a special conversion device, specialized conversion software, video editing software, and a computer that can handle all of that computation.
So let’s talk about the pros and cons of doing it yourself versus hiring a professional.
- DIY film digitization means you’re going to need specific equipment. The equipment required will depend on what film you’ve got. It’s going to be different for 8mm or 16 mm film, VHS, and even DVD. If you already have or can find the equipment at a decent price, then this option can be done without a huge expense.
- Hiring a professional can mean a higher quality final product and correct handling of heirloom films, provided you hire a professional who’s going to do things the right way. If the required equipment isn’t easily found (or is prohibitively expensive), then hiring a professional will be the better financial option.
There isn’t a right or wrong answer – just what works better for you and your situation. Even so, let’s discuss most of the common concerns via a list of pros and cons. That way, you’ll have a quick (but good) idea of which route to take.
- The monetary cost of digitizing film will largely depend on the equipment required and what you’ve already got on hand. For example, if you don’t already have a computer with a Blu-Ray burner (or a DVD burner), then your costs to digitize film will include buying a computer. Or if you have a computer and just need a VHS converter, then your costs are lower.
- The time involved in digitizing videos is mostly waiting and babysitting a computer. If you have lots of kids at home, you’ll have to babysit it more closely so that they don’t turn the computer off while it’s rendering. In that case, hiring a professional may be worth the time savings alone.
- Horror stories of mangled, mishandled, or lost film, botched final videos, and general mayhem exist on both ends of the spectrum (DIY or hired). The hired stories do get a lot of traction, but most of them can be avoided by hiring a reputable and knowledgeable company to do the digitization. Also, try to work with them in person. That will help avoid any “lost or destroyed by a third-party carrier issue, like through the mail. And so will hiring them at a less-busy time of year, whenever that may be.
- The stress, liability, and headache of yet another DIY project. Breanne’s father-in-law is a savvy guy. She asked him about digitizing some old 8 mm film. Even with all of his know-how, he recommended she hire someone. Taking on yet another project (with a huge liability in the form of a valuable family film reel) is something he recommends handing to a professional.
If you would prefer to hire a professional to do this for you, here are some places that offer that service.
- Costco
- Walgreens
- Walmart
- iMemory
- Legacy Box
If you do want to do this yourself, Breanne found a couple of great resources and documents. We’ll list them here for your reference. All of these links open in new windows for your convenience.
- PDF on how to transfer video from tape, DVD, or camera to a computer (click here).
- Information on the best VHS to digital converters from two sources (click here or here).
- Amazon has conversion cables – feel free to shop those here.
- A step-by-step guide by PC Magazine, including information on the software to do the conversion – click here.
- Open-source video software like OBS Studio. I’ve used this, and it’s pretty decent for video recording and live streaming.
- For video editing, I (Kimberly) use DaVinci Resolve. It’s also free and it has a better user interface than OBS, in my opinion. You can get it here.
Doing a video transfer yourself is a huge topic – enough so that if we’re going to do a tutorial, it would have to be addressed in a whole other article. As of right now, we don’t have plans to do a tutorial. If that changes, we’ll update this article and link to it for your convenience.
How Expensive are Digitizing Services?
Now, if you’re thinking that a DIY digitization project doesn’t sound like your idea of fun, know you aren’t alone. This is why there are so many digitization services out there!
But how much do they cost? Let’s break it down for you. Here are the services that we priced out, both by the cost of digitizing a VHS tape and a reel of film. (Don’t worry about the links in the table – we’ll link to the services again at the end of this section of the article.)
| Digitizing Service | Cost per VHS | Cost per Reel |
|---|---|---|
| iMemories | $14.99 | $14.99/50 feet |
| Costco | Starting at $19.99 | Starting at $19.99 |
| Legacy Box | $53.99-$1,019.99 for between 2-40 items + $5.99 per storage device | |
| Walgreens | Starting at $34.99 | Starting at $29.99 |
| CVS | $25.99-$34.99 per item depending on the storage device you choose (the price is the same for reels) | |
| Kodak Digitizing | $69.98-$1,199.98 depending on the number of items | |
| Memory Box | $59-$549 depending on the number of items (does not charge differently between tapes and reels) | |
| South Tree | $15/item + 9.99 per storage device | $25/item + 9.99/storage device |
The price of a reel was harder to figure out, although I did find an infographic on DVD Your Memories that offered a simple breakdown. Here’s what it said for a general rule of thumb for reel lengths.
- A 3-inch long reel is usually about 50 feet of film.
- A 5-inch long reel is about 200 feet of film.
- A 7-inch long reel usually has about 400 feet of film.
Then, I got curious and had to look up how much film is on a VHS, just because I like to be thorough.
- A VHS tape can be 812-1,410 feet of film, depending on the type of tape and playback used.
In other words, our wallets would be a lot lighter if these companies charged 50 feet of tape like some of the reel-based prices do. A 1,000-foot-long VHS would cost $299+ before taxes!
Now, there are also a lot of people online via various platforms (including Amazon, Fiverr, and other classifieds-based sites) who advertise doing this service for you. As we mentioned earlier, though, these one-off services require more research. They may have better pricing, but only you can decide if the risk of mailing your precious films to someone else is worth it.
Generally, we recommend working with a known and reputable service in-person to avoid using the mail. We also recommend sticking with a known and reputable person, company, or brand for this kind of service.
We’ll keep networking to find individuals we would trust with our family films and digitization projects. Until then, please do your research.
And seriously – consider using an in-person service. It’s often easier, cheaper, and safer than springing for the shipping costs.
Finally, here’s that list of services again in a list format. We know that clicking links in a table isn’t for everyone. All of these links take you directly to the listed website. All open in new windows.
And sometimes, we fat-finger things on mobile devices, too. No judgment from us – just lots of understanding and extra lists.
How to Store Original VHS Tapes
When storing original VHS tapes, then it’s important to remember the basic rules of preservation.
Choose VHS storage containers that are:
- Acid-free
- Lignin-free
- Magnetic-free (magnets destroy VHS tapes)
- Appropriately sized containers
Then, store those containers in an area that is:
- Temperature controlled
- Moisture and humidity controlled
- Light controlled for minimum exposure to tape-damaging light
- As close to the middle of your home as possible – this will help with the above three issues, too!
- Clean (ish) so that dust doesn’t ruin the tapes
- Away from magnets and loudspeakers
Finally, here is the most important tip for storing VHS tapes. It’s one I didn’t know until Breanne showed me the research for this article.
Store VHS tapes upright and rewound. Tapes stored lying down will cause the tape to sag (thank you, gravity), which will ruin the stored film.
It’s a good thing I only have one VHS tape – so it was pretty easy to fix this issue!
Why you’d want to store a VHS tape in its ‘rewound’ position is twofold.
- The first is just common courtesy. I haven’t watched a tape in several decades, but I remember how aggravating it was to put in a tape – only to realize I had to rewind the whole thing! So store it rewound, please. 🙂
- The second reason to store a tape “rewound” is that it helps keep the film tape tight – thus also helping prevent saggy, unwatchable tape syndrome.
Oh, and one final tip: store your VHS player next to your tapes if you can. I mean, the odds are that you aren’t playing VHS tapes on a regular basis. If you are, go ahead and leave it plugged into your TV. But if you aren’t using them on a regular basis, it’ll be nice to know where the VHS player is when you need it. And then it’ll be right next to the tapes.
How to Store Original Video Reels
When it comes to storing video reels, it’s going to follow all of the same rules for storing a VHS – with a few extras. So let’s list them all. That way, there’s zero confusion, just properly stored video reels.
Choose film reel storage containers that are:
- Acid-free
- Lignin-free
- Magnetic-free (magnets destroy film)
- Appropriately sized containers
- Touch-free from anything
Some expert film sources say that the container should also be airtight, while others say it should be open to allow the film to breathe. So it’s as clear as mud for the time being. We’ll keep looking into it, but know that this is one point that’s still being debated by the experts.
In the reel’s storage canister, make sure that nothing is able to touch the film. Double-check to make sure that paper, rubber bands, or tape especially doesn’t touch the reel. Those items will destroy or degrade the film.
Then, store those containers in an area that is:
- Temperature controlled
- Moisture and humidity controlled
- Light controlled for minimum exposure to tape-damaging light
- As close to the middle of your home as possible – this will help with the above three issues, too!
- Clean (ish) so that dust doesn’t ruin the tapes
- Away from magnets and loudspeakers
If you’d like to take your film preservation skills to the next level, some film companies even recommend sticking the canister in a refrigerator or freezer. You can read that and other recommendations from the film pros at sites like this one here.
Final Thoughts
Preserving family videos is an amazing process. And while it can seem daunting up front, I promise that once you get the hang of these steps, they do become basic, common-sense types of things.
But if it takes you a while to get to that “oh, preserving stuff is second nature” phase, don’t worry. I’m still working on it, too. Until then, let’s all be grateful for these guides to help us remember all of the steps. And I’d like to give a huge thank-you to Breanne for compiling all of this information!
Now, get out there and preserve your family’s videos. You never know when your family will want to see that one, hugely-embarrassing dance recital. I do wish I had that one – it really was bad but in a funny way.
Related Questions
What’s the Safest Way to Store Family Documents? The safest way to store family documents is in an archival-quality storage container. Read our article on storing family documents or check our recommended tools page to see which brands we recommend.
How Do You Preserve Family Recipes? Family recipes should be stored in archival-quality containers, though that may be limited by a desire to continue using those recipes. For more information and unique preservation ideas, see our complete guide to preserving family recipes.
What is Preservation? Preservation is the act of keeping documents, items, and heirlooms in stable condition for the future. For more information on preservation, be sure to read our article on preservation.
